Getting Started
Welcome to Cardinal! As mentioned on the homepage, Cardinal is designed to be an open source Cisco access point controller. Cardinal is built on Python and uses paramiko to handle the configuration of access points via SSH. In order to use Cardinal, your Cisco AP’s must be in autonomous mode (K9W7 IOS) and have SSH enabled.
The foundation of Cardinal is built on three systems (or pillars):
- MySQL
- Python3
- NGINX
Being that Cardinal is a WSGI application, the web interface requires a WSGI-compliant web server. NGINX is an example of a WSGI-compliant web server and for that reason, Cardinal is developed around this. Even though NGINX is used for the development of Cardinal, that doesn’t mean you couldn’t use another WSGI-compliant web server.
Before we begin with the installation, please make sure you have a stable Linux environment ready to go. Cardinal development is performed on Ubuntu, however, that doesn’t mean you couldn’t use RHEL/CentOS or another distro. As long as you’re able to install Cardinal’s three pillars, you should be good to go.
For this walkthrough, I’m going to install Cardinal in an Ubuntu 18.04 environment. Again, even though this is being performed on Ubuntu, you can adapt the instructions to the RHEL/CentOS equivalents. If you want to test Cardinal in a quickstart environment, please checkout the Docker project here.
System Requirements
Per the introduction above, Cardinal operates on three pillars:
- MySQL
- Python3
- NGINX
Development of Cardinal is currently taking place on MySQL 5.7 with Python3 (i.e. 3.5, 3.6, and 3.7) and NGINX 1.16.0. Please make sure you install these three components and their associated dependencies before proceeding.
sudo apt install mysql-server mysql-client nginx python3-venv python3-dev libmysqlclient-dev build-essential traceroute
Most distributions have moved to Python3, so you shouldn’t need to install Python3 manually. If you’re system doesn’t have Python3, please install it as it’s required. Cardinal is tested on Python 3.5+, so installing at least Python 3.5 is highly recommended.
Once you have NGINX, MySQL, and Python3 installed, now we can proceed to install Cardinal.
Installation
Cardinal has an install script within bin/ called install.sh. Using install.sh will allow you to interactively input values used for the Cardinal .ini config. The .ini config file is very important for both Cardinal and scout. If you’re not using install.sh, please make sure you fill the .ini file correctly and set the CARDINALCONFIG environment variable to point to the .ini file’s location.
In order to better understand the Cardinal installation process, let’s break down install.sh. The first step install.sh performs is gathering basic information about the environment:
echo "Welcome to the Cardinal Initial Configuration Guide!"
echo -e ""
read -p "Hello, welcome to Cardinal! What is the hostname/IP address of the database for Cardinal? " dbIP
echo -e ""
read -p "Ok, I got it. How about an username for the database? " dbUsername
echo -e ""
read -p "Great! How about a password for the database? " dbPassword
echo -e ""
read -p "Okay, now we need a name for the database. What is the database name? " dbName
echo -e ""
read -p "Okay, now we need to add a Cardinal Admin. What is the desired username for Cardinal? " cardinalUser
echo -e ""
read -p "Okay, now what is the Cardinal Admin's password? " cardinalPass
echo -e ""
read -p "Where do you want to store your MySQL database information? " dbCredDir
echo -e ""
read -p "Where is the location of the scout command directory? " commandDir
echo -e ""
read -p "What is the desired Flask key? (i.e. Securing session data) " flaskKey
Information such as the MySQL connection info (e.g. IP/hostname, username, and password), desired Cardinal username/password, scout’s command directory, and the Flask session key are gathered here.
Each of the values are stored in a variable and then used later for the installation.
After we gather the needed information, we then create a system user called cardinal, which will run some systemd processes when the application is live:
# Create a system user called cardinal. The cardinal user is the user which will run our processes
sudo useradd cardinal
After creating the cardinal user, we then create some log files for the Cardinal UI. All of Cardinal’s client transactions (e.g. Nginx/uWSGI) and scout runs will report to cardinal.log.
scoutFetcher() transactions will be reported to fetcher.log:
# Create a log file for Cardinal UI
rm -rf /var/log/cardinal
mkdir -p /var/log/cardinal
touch /var/log/cardinal/cardinal.log
touch /var/log/cardinal/fetcher.log
chown -R cardinal:cardinal /var/log/cardinal
After creating the Cardinal UI log file, we then create a Python3 venv for cardinal. install.sh creates one called cardinal and places it within bin/:
# Generate Cardinal venv
sudo python3 -m venv $cardinalBase/cardinal
sudo $cardinalBase/cardinal/bin/pip install -U pip
sudo $cardinalBase/cardinal/bin/pip install -r $cardinalBase/../requirements.txt
sudo $cardinalBase/cardinal/bin/pip install $cardinalBase/../lib/.
After creating Cardinal’s Python3 venv, we then create a socket directory for uWSGI to read/write to:
# Create a socket directory for uWSGI
rm -rf /var/lib/cardinal
mkdir -p /var/lib/cardinal
chown -R cardinal:cardinal /var/lib/cardinal
After creating a Cardinal socket directory, we need to make sure cardinal can read the values within the .ini file:
# Set permissions on the cardinal.ini file
chown -R cardinal:cardinal $dbCredDir/cardinal.ini
In order for Cardinal to function, we need a MySQL database for Cardinal to read/write to. The following steps create a MySQL database, using the credentials provided from the first step. We also create a Cardinal admin account and generate an encryption key for sensitive database values:
# Create the MySQL database for Cardinal. We also want to import the SQL structure too!
mysql -u$dbUsername -p$dbPassword -e "CREATE DATABASE "$dbName""
mysql -u$dbUsername --password=$dbPassword $dbName < ../sql/cardinal.sql
mysql -u$dbUsername --password=$dbPassword mysql -e "update user set plugin='mysql_native_password' where User='root'"
mysql -u$dbUsername --password=$dbPassword mysql -e "update user set authentication_string=password('$dbPassword') where user='root'"
systemctl restart mysql

# Create a Cardinal admin
hashedPass=$(cardinal/bin/python -c 'from werkzeug.security import generate_password_hash; print(generate_password_hash("'$cardinalPass'", "sha256"))')
mysql -u$dbUsername -p$dbPassword $dbName -e "INSERT INTO users (username,password) VALUES ('$cardinalUser','$hashedPass')"

# Generate encryption key
encryptKey=$(cardinal/bin/python -c "from cryptography.fernet import Fernet; print(Fernet.generate_key().decode())")
Finally, we take the values from the first step and generate a .ini file:
# Create a configuration file based on user input
rm $dbCredDir/cardinal.ini
touch $dbCredDir/cardinal.ini
echo "[cardinal]" >> $dbCredDir/cardinal.ini
echo 'dbserver'=""$dbIP"" >> $dbCredDir/cardinal.ini
echo 'dbuser'=""$dbUsername"" >> $dbCredDir/cardinal.ini
echo 'dbpassword'=""$dbPassword"" >> $dbCredDir/cardinal.ini
echo 'dbname'=""$dbName"" >> $dbCredDir/cardinal.ini
echo 'commanddir'=""$commandDir"" >> $dbCredDir/cardinal.ini
echo 'flaskkey'=""$flaskKey"" >> $dbCredDir/cardinal.ini
echo 'encryptkey'=""$encryptKey"" >> $dbCredDir/cardinal.ini
echo 'commanddebug=off' >> $dbCredDir/cardinal.ini
If install.sh didn’t error out and you have a .ini file in the appropriate location, congraulations! Cardinal should be configured and ready to launch!
Nginx Configuration
Before Cardinal can launch, we need to tell NGINX how to read the uWSGI socket. In Cardinal’s conf/ directory, there’s a sample NGINX configuration that we can use.
user  www-data;
worker_processes  1;

#error_log  logs/error.log;
#error_log  logs/error.log  notice;
#error_log  logs/error.log  info;

#pid        logs/nginx.pid;


events {
    worker_connections  1024;
}


http {
    include       /etc/nginx/mime.types;
    default_type  application/octet-stream;

    #log_format  main  '$remote_addr - $remote_user [$time_local] "$request" '
    #                  '$status $body_bytes_sent "$http_referer" '
    #                  '"$http_user_agent" "$http_x_forwarded_for"';

    #access_log  logs/access.log  main;

    sendfile        on;
    #tcp_nopush     on;

    #keepalive_timeout  0;
    keepalive_timeout  65;

    #gzip  on;

    server {
    listen 80;
    server_name <SERVER_NAME_HERE>;

    location / {
        include uwsgi_params;
        uwsgi_pass unix:///var/lib/cardinal/cardinal.sock;
    }
}}
systemd Configuration
In order for Cardinal to start on system startup, we need to add a systemd service. Just like the NGINX configuration, there’s a systemd config in the conf/ directory as well:
[Unit]
Description=Cardinal - Open Source Cisco Access Point Controller
After=network.target

[Service]
User=cardinal
Group=www-data
WorkingDirectory=<PATH_TO_CARDINAL_WEBAPP_DIRECTORY>
Environment="PATH=<PATH_TO_CARDINAL_VIRTUALENV>:/usr/local/sbin:/usr/local/bin:/usr/sbin:/usr/bin:/sbin:/bin:/usr/games:/usr/local/games:/snap/bin"
Environment="PYTHONPATH=<PATH_TO_SCOUT_LIBRARY>"
ExecStart=<PATH_TO_CARDINAL_VIRTUALENV_UWSGI> --ini wsgi.ini --logto /var/log/cardinal/cardinal.log

[Install]
WantedBy=multi-user.target
Please make sure you fill in the preceding values correctly. Once you have completed the systemd configuration, please run systemctl daemon-reload to initialize the service.
Additional Configuration
In order for Cardinal to function with uWSGI, please make sure that CARDINALCONFIG is added to the webapp/wsgi.ini file:
[uwsgi]
module=wsgi:Cardinal
master=true
processes=5
socket=/var/lib/cardinal/cardinal.sock
chmod-socket=660
vaccum=true
die-on-term=true
env=CARDINALCONFIG=<PATH_TO_CARDINAL_INI>
Cross Your Fingers!
Once you have performed the preceding steps, please check to make sure all of the pillars are functioning properly:
systemctl status mysql
systemctl status nginx
Once you have verified that MySQL and NGINX are functioning properly, you can then start Cardinal:
systemctl start cardinal
The Cardinal UI
You should be able to navigate to the Cardinal UI at http://<CARDINAL_SERVER>. The login screen should look like this:
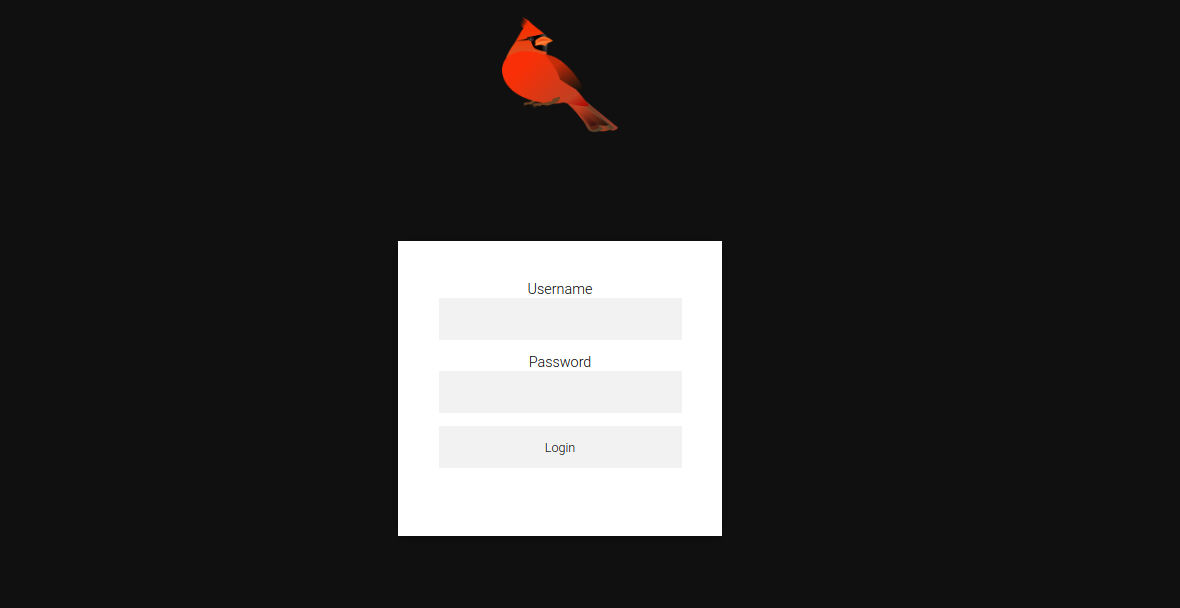
Please try logging in with the username/password specified when running install.sh or whatever entries you manually provided to MySQL.
You should see the following screen if you’re logged in:
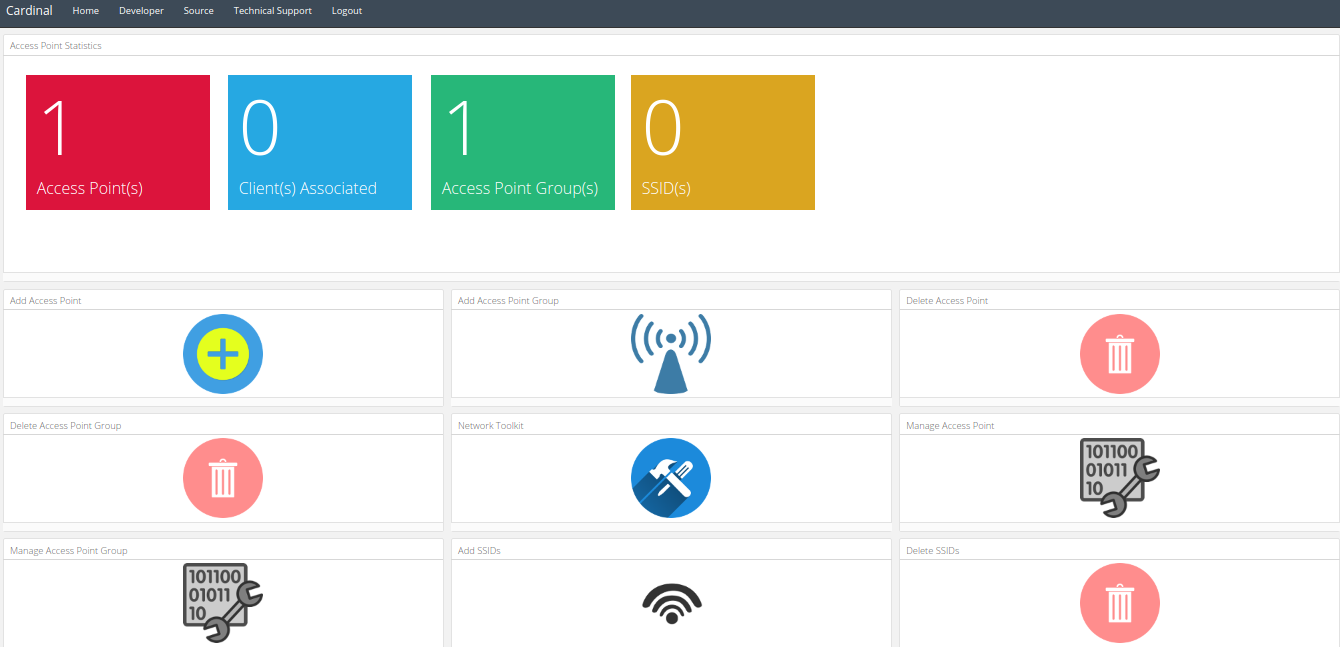
Now you can start using Cardinal to manage your Cisco APs!
Using fetcher()
Currently, you can fetch information about your access point via the Fetch AP Information tile in Cardinal. If you want to run a fetch
on all of your access points, please utilize crontab and set the interval appropriately:
cd /opt/Cardinal/webapp && PYTHONPATH=/opt/Cardinal/bin/cardinal/lib/python3.5/site-packages/scout /opt/Cardinal/bin/cardinal/bin/python -c "import cardinal; cardinal.system.cardinal_fetch.gatherAllApInfo()" >> /var/log/cardinal/fetcher.log
The preceding crontab example will call the scoutFetcherForAll() function every minute to collect AP information.
At the present time, the operations surrounding scoutFetcherForAll() are being improved upon. Using a crontab entry is a workaround for the time being.